Guides ·
Blackened, mouldy silicone in the bathroom: how to replace it properly
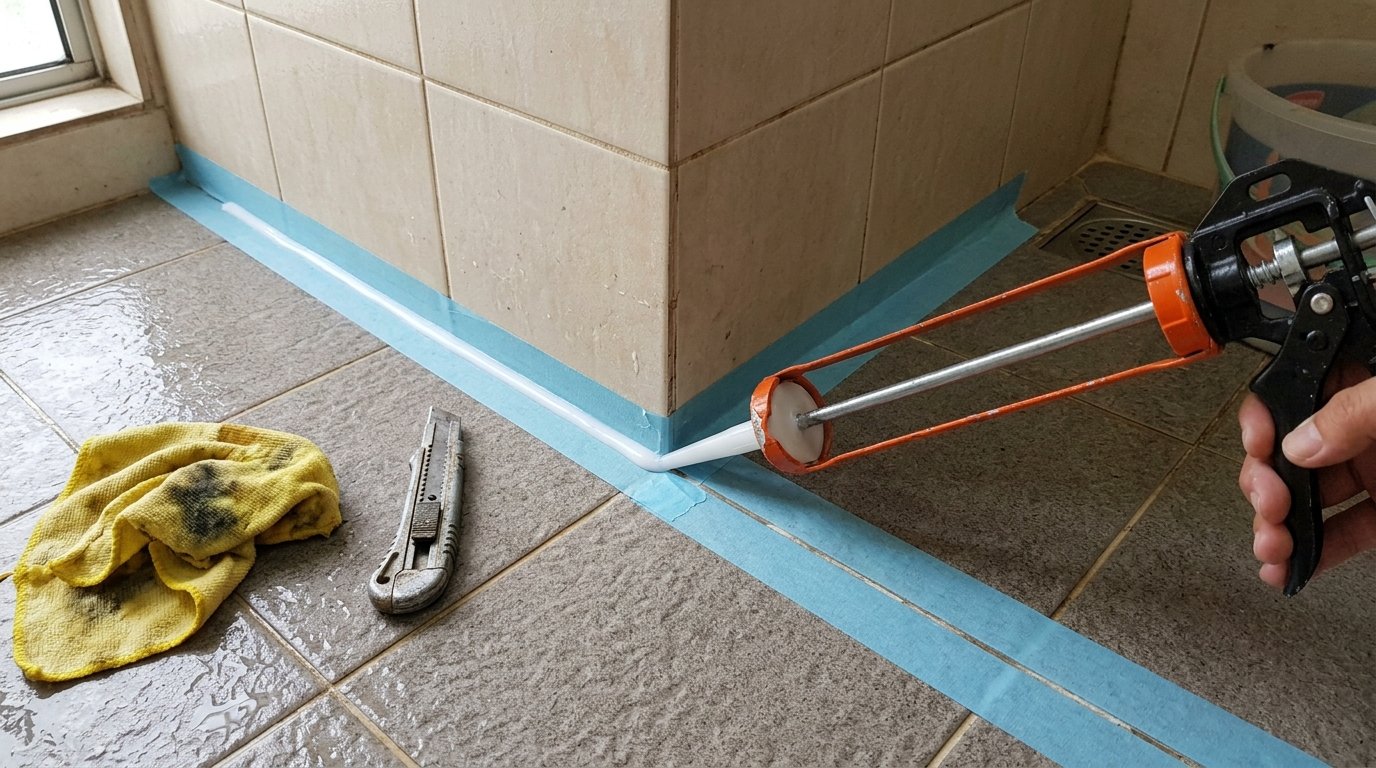
Short version: once a silicone bead has turned black, cleaning will not save it. The mould you can see is only the surface of a colony that has grown down into the body of the silicone — which is why bleach turns it white for a few weeks and then the stains come straight back. The lasting fix is to strip the old bead out completely, get the joint clean and bone dry, and run a fresh bead of sanitary-grade anti-fungal silicone. It is a satisfying half-day DIY job, or a small line item on a handyman visit if you would rather keep your Saturday.
Why the black never washes off
Silicone in a Malaysian bathroom lives in a perfect mould nursery: warm all year, wetted twice a day, and coated in exactly what mould eats — soap residue and body oils. The mould does not just sit on the bead. Its filaments grow into the silicone itself, so the stain runs deep below the surface. Household bleach kills and whitens the top layer, but it cannot reach the growth inside, and within weeks the colony resurfaces. That is the honest reason cleaning products keep “working” and then failing: they only ever treat the top half-millimetre.
The other culprit is often the silicone itself. General-purpose silicone from the hardware shop contains no fungicide, and in a shower it can start spotting within months. Sanitary-grade silicone carries an anti-fungal additive and, in our experience re-doing bathrooms around Serdang and Seri Kembangan, keeps a shower joint presentable for years rather than months. Same gun, same effort — about ten ringgit more for the right tube.
Stripping the old bead: the step everyone rushes
New silicone will not bond to old silicone — not even a thin leftover film. Residue in the joint is the reason so many re-done beads start peeling within months. If you do one thing slowly, make it this:
- Slice along both edges of the bead with a sharp snap-off blade, then peel it out in the longest strips you can manage.
- Scrape the stubborn bits with the blade held almost flat against the tile, so you shave residue without gouging grout.
- Use a silicone remover gel on the final film, then wipe the joint with methylated spirit or alcohol.
- Let the joint dry completely — overnight is ideal, because moisture trapped underneath is tomorrow’s mould farm.
Choosing the tube
| Type | Typical shop price | In a wet bathroom |
|---|---|---|
| General-purpose (acid cure) | RM 8–15 | No fungicide — blackens fastest, avoid for showers |
| Sanitary anti-fungal | RM 20–40 | Made for wet areas — the right default choice |
| Neutral-cure sanitary | RM 25–45 | Kinder to acrylic basins, mirrors and natural stone |
Look for the word sanitary or an anti-mould claim on the tube, and check the date — old stock cures badly.
Getting the new bead right
Take your last shower in that bathroom the night before, because silicone must go onto a dry surface. Run masking tape along both sides of the joint, cut the nozzle to match the gap width, and lay the bead in one continuous pass. Smooth it with a soapy fingertip or a silicone tool, pull the tape while everything is still wet, and give it a full 24 hours before the joint sees water again. The tape trick is what separates a tidy professional-looking line from a smeared one.
When black silicone is a symptom, not the problem
One warning from the trade side: if the bead at the base of your shower keeps blackening and lifting within months no matter how well it is re-done, moisture may be reaching the joint from behind the tiles — an early sign of a waterproofing problem rather than a cleaning one. Sealing over it just hides the evidence. Our waterproofing page explains the signs worth checking before you spend on another tube.
Bundle the regrouting while the tools are out
Blackened grout lines usually keep the silicone company, and the raking and cleaning work is the same dusty half of the job. If a handyman is already coming, having the shower regrouted and re-siliconed in one visit costs far less than two separate call-outs — small jobs like these sit at the lower end of the typical RM 100–500 visit range. See our services page for how we bundle small bathroom jobs into one trip.
Facing this problem at your home or shop?
WhatsApp us a photo — honest answer within 1 working hour. Serving Serdang, Seri Kembangan, Kajang & Puchong.
WhatsApp 013-940 0355